字节笔记本
2026年10月6日 · 约 10 分钟读完
Cordis 教程 07:把模型工具接进 harness
本文是 Cordis 实战系列的收官一篇,素材整理自 DeepSeek 开源的 agent 框架 deepseek-harness(MIT 协议)的官方教程。Cordis 是这个框架底层的插件运行时:工具、LLM(大语言模型)适配器、文件访问乃至 agent loop(智能体循环)本身,都是挂载在共享上下文上的插件。系列前几篇已经依次走过插件函数、生命周期与 effect、服务、事件、配置以及组合与热重载,本篇做最后一步:向 harness 的 tools 服务注册一个可由模型调用的工具,让它通过 harness 的工具流水线执行,并观察结果事件。整个示例无需任何 API 密钥,也不会真的调用模型。
写一个工具插件
创建 greet-tool.ts,放在仓库的 tmp/cordis-tutorial 临时目录里:
import type { Context } from '@deepseek-ai/cordis'
import { defineTool } from '@deepseek-ai/dsh-tools'
import { CallId } from '@deepseek-ai/dsh-llm'

export const name = 'greet-tool'
export const inject = ['tools']

export function apply(ctx: Context) {
  ctx.tools.register(defineTool({
    name: 'greet',
    description: 'Greet the named person.',
    parameters: {
      name: { type: 'string', required: true, description: 'Who to greet' },
    },
    output: {
      schema: { type: 'string' },
      render: (_args, value) => [{ type: 'text', text: value }],
    },
    async execute(args) {
      return `Hello, ${args.name}!`
    },
  }))

  // Drive one call through the real execution pipeline, standing in for
  // the model. CallId brands the correlation id a provider would issue.
  void (async () => {
    const result = await ctx.tools.execute({
      callId: CallId('demo-1'),
      name: 'greet',
      arguments: { name: 'Cordis' },
      signal: new AbortController().signal,
    })
    console.log('tool replied:', JSON.stringify(result.content))
  })()
}
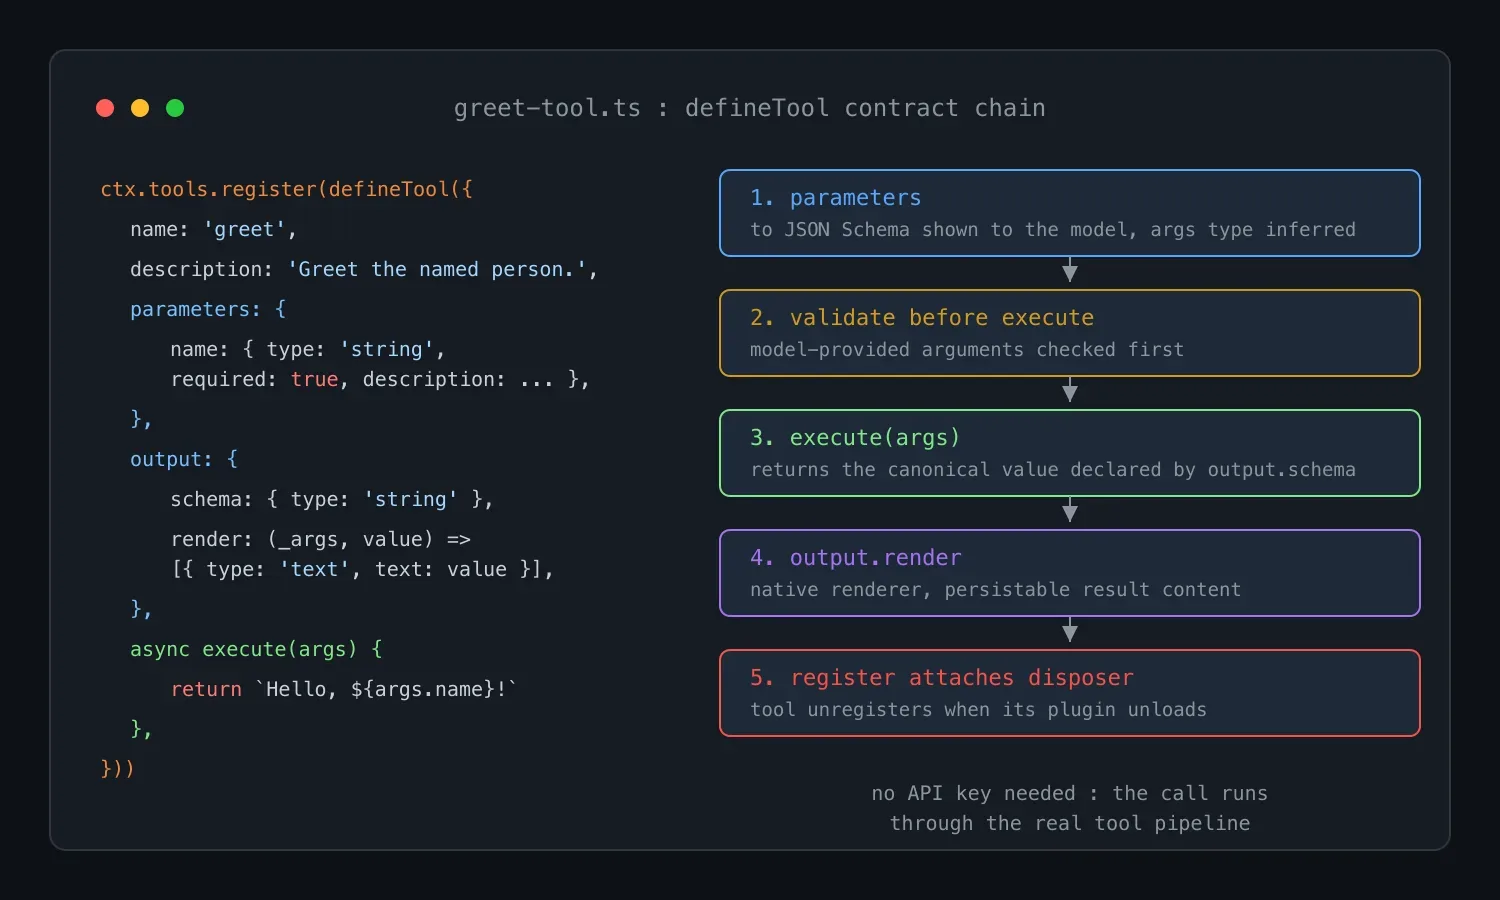
这段代码里的每个模式都是 Cordis 的基础模式:inject: ['tools'] 声明对工具注册表服务的依赖,插件会等它就绪后再启动;ctx.tools.register(...) 把注册时产生的 disposer 附着到插件自身,插件卸载时工具会随之注销,不会留下悬空的能力。defineTool 做了三件事:把 parameters 规约转换成展示给模型的 JSON Schema,推导出 args 的静态类型,并在 execute 运行之前校验模型提供的参数。工具本身返回由 output.schema 声明的规范值,而 output.render 充当原生渲染器(Native renderer),另行生成可持久化的结果内容。
插件文件末尾还有一段立即执行的异步逻辑:它直接调用 ctx.tools.execute,用 CallId('demo-1') 充当真实场景中由模型服务下发的关联 ID,替模型发起一次调用,并把返回内容打印到终端。换句话说,不需要模型参与,这个示例就能跑通工具执行的完整通路,适合在无密钥环境里验证插件的接线是否正确。
用事件观察每一次工具调用
再创建一个独立的观察插件 tool-logger.ts:
import type { Context } from '@deepseek-ai/cordis'
import type {} from '@deepseek-ai/dsh-tools'

export const name = 'tool-logger'
export const inject = ['tools']

export function apply(ctx: Context) {
  ctx.on('tools/result', (exec, result) => {
    const text = result.content
      .map(block => (block.type === 'text' ? block.text : ''))
      .join('')
    console.log(`[tool-logger] ${exec.name} -> ${text}`)
  })
}
import type {} from '@deepseek-ai/dsh-tools' 这一行看似什么都没有导入,实际会引入该包的声明合并(declaration merging),让 'tools/result' 事件名及其载荷获得完整类型。这与在本地模块上扩充类型声明是同一机制,只是延伸到了包级别。装上这个插件后,应用里发生的每一次工具调用都会经过 harness 的 tools/result 事件被它看到。
组合并运行
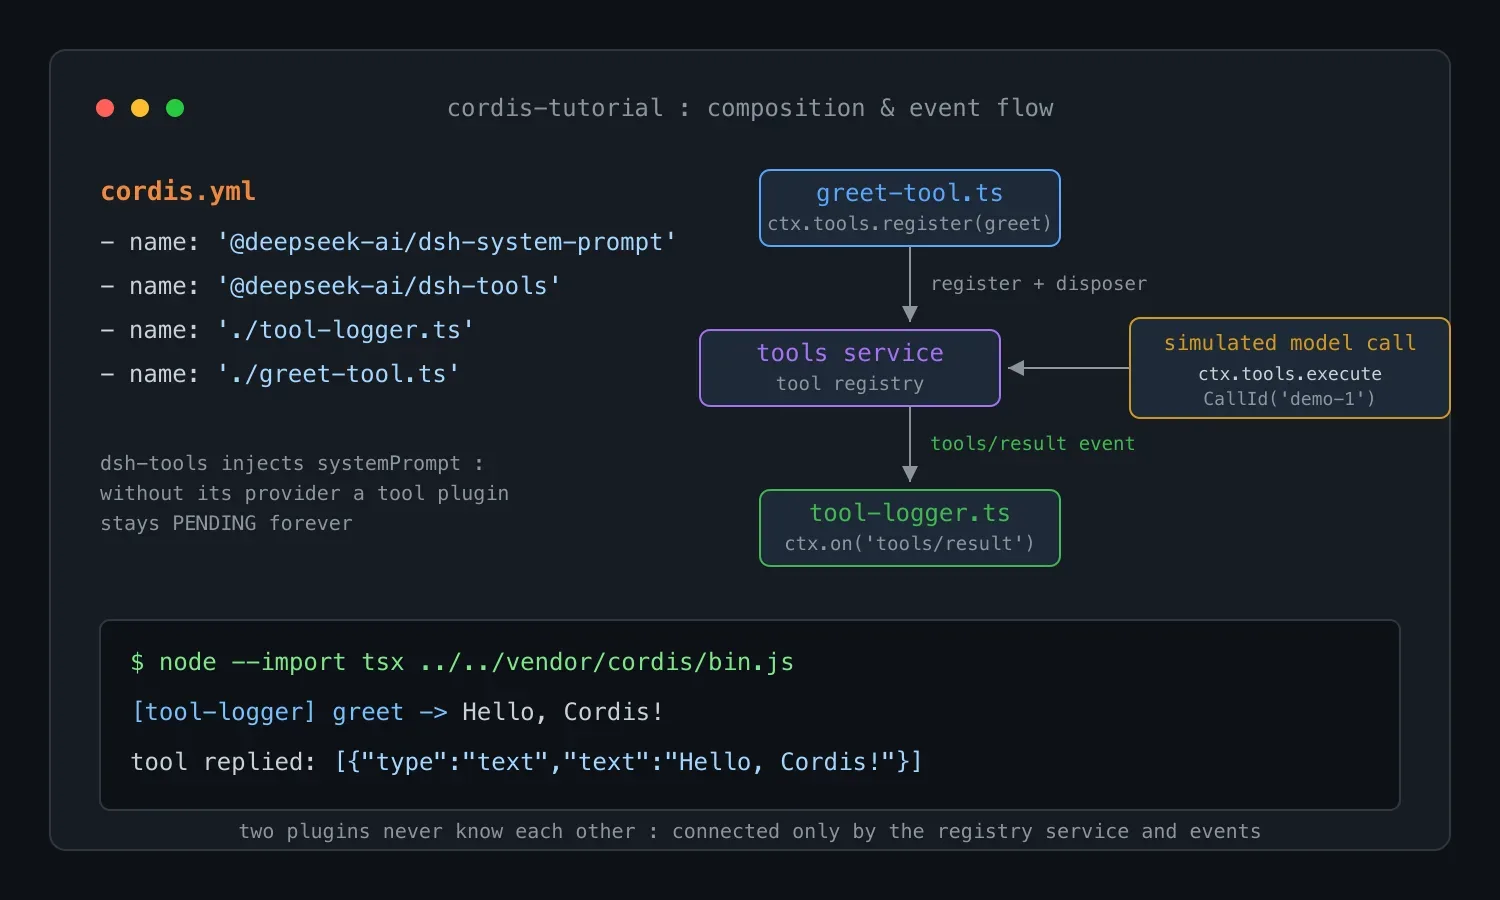
在 cordis.yml 里按顺序列出四个插件:
- name: '@deepseek-ai/dsh-system-prompt'
- name: '@deepseek-ai/dsh-tools'
- name: './tool-logger.ts'
- name: './greet-tool.ts'注意前两行的顺序并非随意:@deepseek-ai/dsh-tools 会注入 systemPrompt 服务,因为每个工具都要向系统提示词贡献自己的 schema,所以组合里必须同时列出该服务的提供方。缺少提供方时,工具插件会停留在 PENDING 状态,永远加载不起来。
随后在临时目录里运行教程统一的启动命令:
node --import tsx ../../vendor/cordis/bin.js预期输出:
[tool-logger] greet -> Hello, Cordis!
tool replied: [{"type":"text","text":"Hello, Cordis!"}]
logger 先于调用方打印:tools/result 事件在结果物化的过程中发出,早于 execute 向调用方返回的 promise 兑现。更值得体会的是,greet-tool 与 tool-logger 两个插件互不知晓对方的存在,把它们连接起来的是注册表服务与事件系统。这正是 Cordis 把每项能力做成插件的意义:能力可以随时挂载、替换、卸载,而彼此之间只通过服务与事件对话。
从这里走向完整 agent
真实的 agent 就是这套组合再加上更多插件:LLM(大语言模型)适配器、agent loop(智能体循环)、持久化和运行入口。对照仓库 examples/headless-agent/cordis.yml 这个现成示例,读到这里你已经能看懂其中每一个配置项的含义;把 greet-tool.ts 加进该文件的副本,这个工具就会出现在对应 agent 的能力清单里。
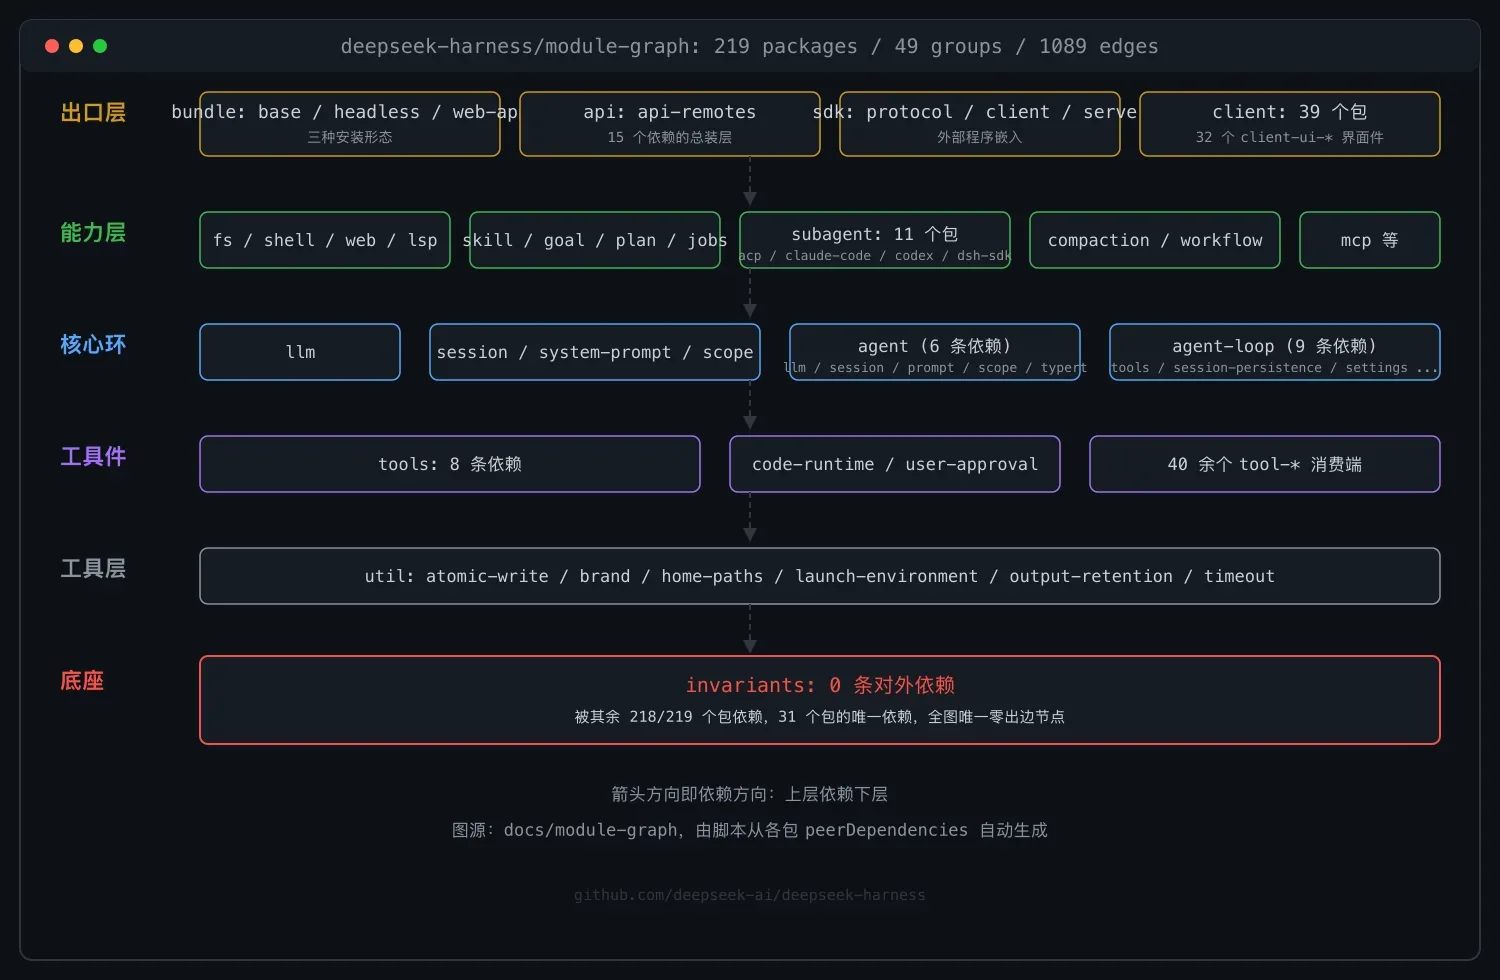
想继续深入,可以顺着 deepseek-harness 仓库(github.com/deepseek-ai/deepseek-harness)的文档读下去:工具构建参考里有 defineTool 的完整用法,包括呈现与更丰富的 schema;三层能力设计文档讲 harness 如何组织可替换的能力;各子系统页面上的 cordis-surface 区块列出了所有可注入与可监听的内容;架构文档则是这些插件所处的系统地图。